Grow Lavender From Seed in 7 Steps (90% Success Rate)
The Reality Nobody Tells You First to grow lavender from seed
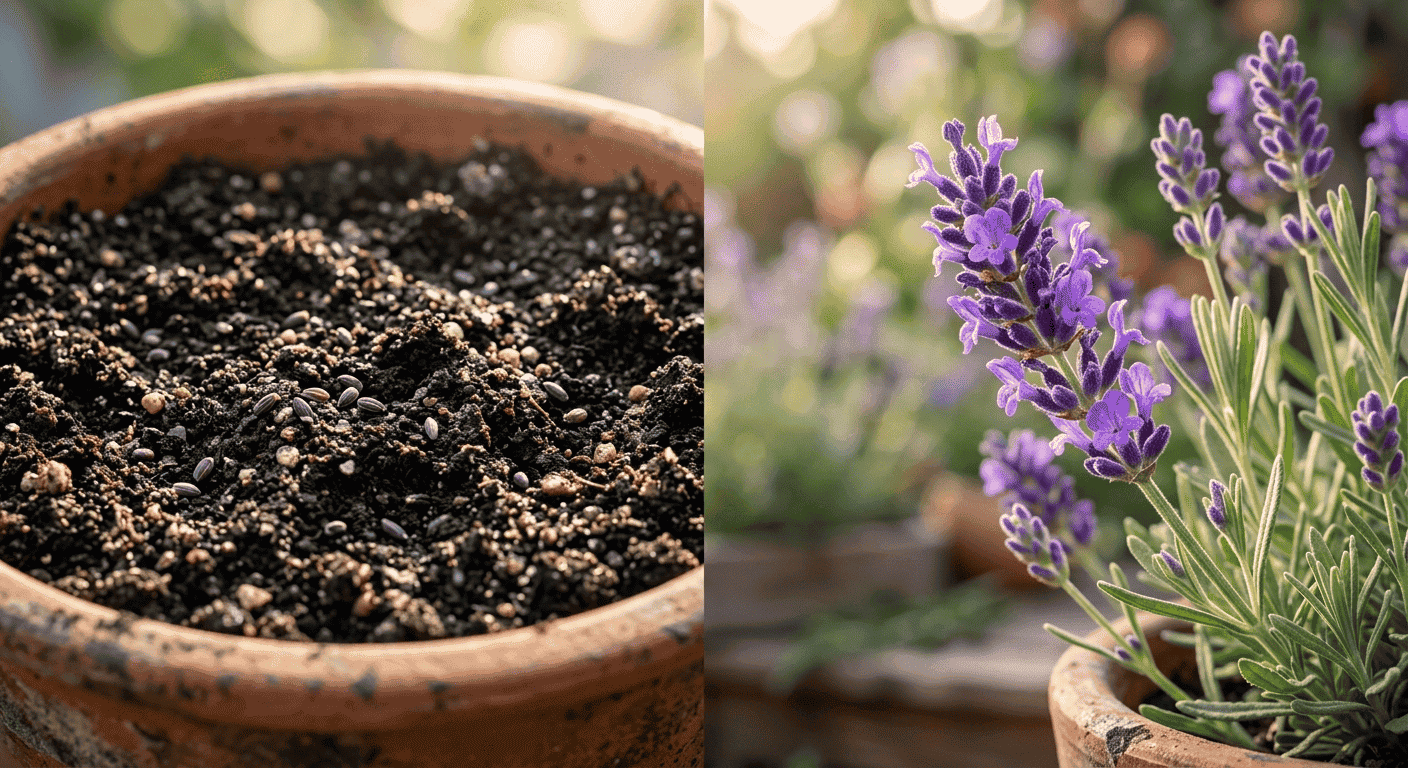
Let’s be honest right from the start — grow lavender from seed is one of the most rewarding things you can do in a garden, but it is also one of the most humbling.
You will find dozens of articles online that make it sound simple. “Just scatter seeds in well-drained soil and wait.” What those articles don’t mention is the weeks of painfully slow germination, the seedlings that suddenly collapse overnight from damping-off, and the very real possibility that your first batch simply doesn’t sprout at all.
That doesn't mean you shouldn't try. It means you should go in prepared.
With the right approach, grow lavender from seed is absolutely doable — even for a complete beginner. It just requires patience, a little science, and an understanding of what lavender actually needs versus what most generic guides claim it needs.
This guide covers everything. From choosing seeds to harvesting your first blooms. No fluff, no filler — just what actually works.
Quick Answer
Lavender seeds need cold stratification (2–4 weeks at 35–40°F), well-draining soil with pH 6.5–7.5, and bright light to germinate. Germination takes 14–90 days depending on variety and conditions. Expect your first blooms in year two, not year one.
Why Grow Lavender from Seed?
Fair question. Lavender cuttings are faster, easier, and more predictable. So why bother with seeds?
A few good reasons:
- Cost. A single packet of seeds costs less than one nursery plant, and you can grow dozens from it.
- Variety access. Some lavender varieties — especially specialty cultivars — are only available as seeds, not transplants.
- Satisfaction. There is something genuinely different about watching a plant grow from seed to full bloom. It builds a connection to the plant that buying a pre-grown lavender simply doesn’t give you.
- Resilience. Seed-grown plants often develop deeper, stronger root systems than cutting-grown ones, especially when started in the right conditions.
Is it worth it? If you have patience — yes, absolutely.
Best Lavender Varieties for Seed Growing
Not all lavender is created equal when it comes to seed germination. Some varieties are notoriously difficult. Others are relatively forgiving.
| Variety | Germination Ease | Bloom Color | Best For | Climate |
|---|---|---|---|---|
| Lavandula angustifolia (English) | Moderate | Purple/Blue | Most beginners | Cool to temperate |
| Lavandula vera | Moderate | Soft purple | Containers, borders | Temperate |
| Lavandula stoechas (Spanish) | Easy | Purple with “ears” | Warm climates | Warm, Mediterranean |
| Lavandula x intermedia (Lavandin) | Difficult (sterile hybrids) | Deep purple | Advanced growers | Temperate to warm |
| Munstead (angustifolia cultivar) | Moderate-Easy | Lavender-blue | Beginners | Cool climates |
| Hidcote (angustifolia cultivar) | Moderate | Deep violet | Compact gardens | Cool climates |
Beginner recommendation: Start with Lavandula angustifolia — specifically the Munstead or Vera varieties. They have the highest germination rates among seed-grown lavenders and are forgiving of minor mistakes.
Avoid Lavandin hybrids entirely for seed growing. They are largely sterile and will waste your time.
How to Choose High-Quality Seeds
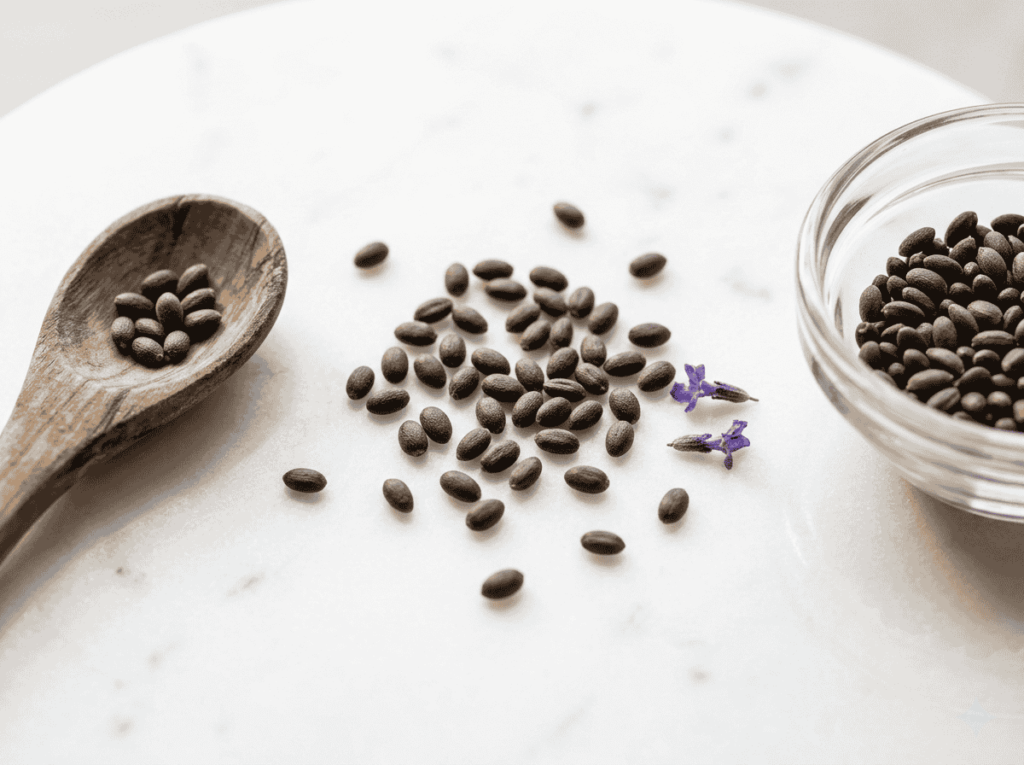
Seed quality makes an enormous difference with lavender. Poor-quality seeds — old stock, improperly stored, or low-viability batches — will give you disappointingly low germination rates no matter how perfectly you follow every other step.
What to look for:
- Harvest date or packed date on the packet. Lavender seeds lose viability quickly. Seeds older than one year are significantly less reliable. Two-year-old seeds are largely a gamble.
- Reputable seed suppliers. Avoid generic marketplace seeds with no origin information.
- Seed count. Quality suppliers list realistic counts. If a packet claims 500 lavender seeds for $1, be skeptical.
- Storage instructions. Seeds that have been kept cool and dry retain viability far longer than those stored in warm, humid conditions.
If you can, do a quick germination test before committing to a full sowing. Place 10 seeds on a damp paper towel, fold it, seal it in a plastic bag, and leave it somewhere warm for 2 weeks. Count how many sprout. If fewer than 5 out of 10 germinate, consider sourcing fresher seeds.
Pre-Sowing Checklist
Before you touch a single seed, make sure you have everything ready:
- Fresh lavender seeds (ideally less than 1 year old)
- Seed-starting trays or small pots with drainage holes
- Seed-starting mix (NOT regular potting soil)
- Perlite (for mixing into soil — 30–40% ratio)
- Plastic wrap or humidity dome
- Spray bottle for watering
- Grow light or south-facing window
- Labels and waterproof marker
- Optional: refrigerator space for stratification
Having everything organized before you start prevents rushed decisions that often lead to mistakes.
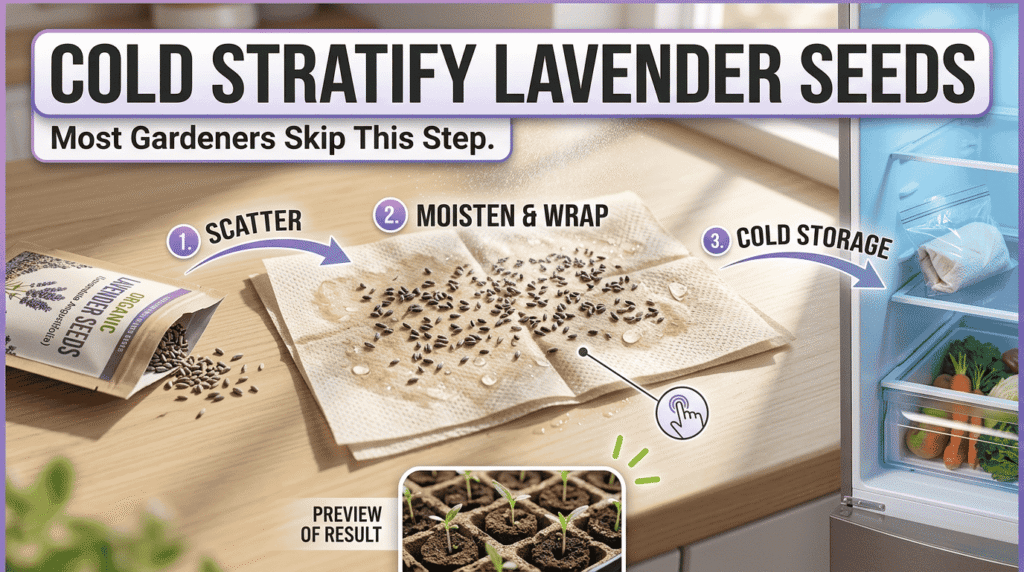
Cold Stratification: The Step Most Beginners Skip
This is the single most important factor that separates successful lavender growers from frustrated ones.
Lavandula angustifolia is native to cool mountainous regions of the Mediterranean. In nature, seeds fall in late summer, experience a cold winter, and germinate when warmth returns in spring. That cold period — stratification — is what triggers the seed’s dormancy break.
Without it, many lavender seeds will simply sit in your tray for months without doing anything, and you’ll assume they’re dead.
How to Stratify Lavender Seeds
Method 1 — Refrigerator Stratification (Most Reliable):
- Place seeds on a barely damp paper towel.
- Fold the towel loosely around them.
- Place inside a small zip-lock bag.
- Label with the date.
- Put in the refrigerator (not freezer) at 35–40°F (2–4°C).
- Leave for 3–4 weeks minimum.
- Check weekly for mold. If mold appears, replace the paper towel.
Method 2 — Winter Sowing (Outdoor Method):
Sow seeds in small containers outdoors in late autumn. Let natural cold temperatures stratify them over winter. They will germinate on their own schedule in spring. This method is low-effort and surprisingly effective in cool climates.
Method 3 — Skip It (Only for Spanish Lavender):
Lavandula stoechas (Spanish lavender) doesn’t require stratification. If you’re growing this variety, skip this step entirely.
Important note: Do not stratify seeds longer than 6 weeks. Extended cold periods can push seeds into deeper dormancy rather than breaking it.
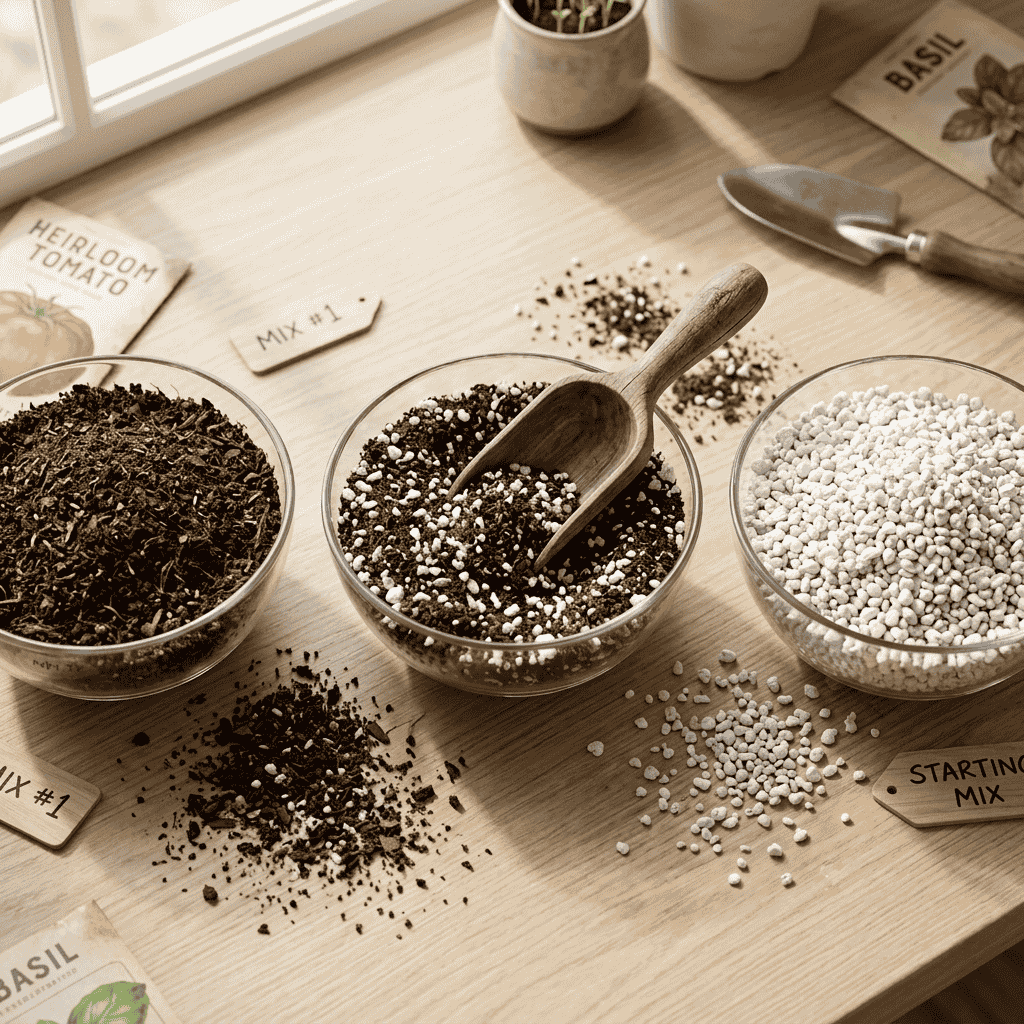
Soil Mix + Drainage Strategy
Lavender does NOT like wet feet. Ever. This is the single most common cause of seedling death and it happens at every stage — from germination through to mature plants.
The ideal soil mix for starting lavender seeds:
- 60–70% seed-starting mix (sterile, lightweight)
- 30–40% perlite (for drainage and aeration)
Do NOT use:
- Heavy garden soil (retains too much moisture)
- Rich potting mixes with high compost content (too much nitrogen)
- Water-retaining gels or moisture-control mixes (the opposite of what lavender needs)
The goal is a mix that drains fast and dries out relatively quickly between waterings. If you pick up a handful of your mix and squeeze it, it should hold shape briefly but fall apart easily when prodded. If it holds together like clay, add more perlite.
Real-world observation: Most overwatering damage isn’t caused by watering too frequently — it’s caused by soil that doesn’t drain fast enough. Two growers can water on the same schedule with very different outcomes if their soil mixes are different.
Ideal Soil pH
Lavender strongly prefers a slightly alkaline to neutral soil pH: 6.5–7.5.
At lower pH values (more acidic), lavender struggles to absorb nutrients, shows pale yellowing leaves, and grows slowly even in otherwise good conditions.
Simple Ways to Test pH at Home
- pH test strips — inexpensive, available at garden centers or online. Dip in a small sample of water used to water your soil.
- pH meter — more accurate, reusable, worth the $10–15 investment if you garden regularly.
- Vinegar/baking soda test — very rough indicator only. Add water to soil sample. If it fizzes with vinegar, soil is alkaline. If it fizzes with baking soda, soil is acidic.
To raise pH (make more alkaline): Add a small amount of garden lime to your soil mix. To lower pH (rarely needed for lavender): Add sulfur or use an acidic peat-based mix carefully.
Step-by-Step Planting Guide
Follow this sequence and you’ll give your seeds the best possible start.
Step 1 — Prepare containers. Fill seed trays or small pots with your perlite-mixed seed-starting medium. Tap gently to settle. Do not compress.
Step 2 — Moisten the soil. Water the mix thoroughly before sowing. You want it evenly damp, not soaking wet. Let excess water drain completely.
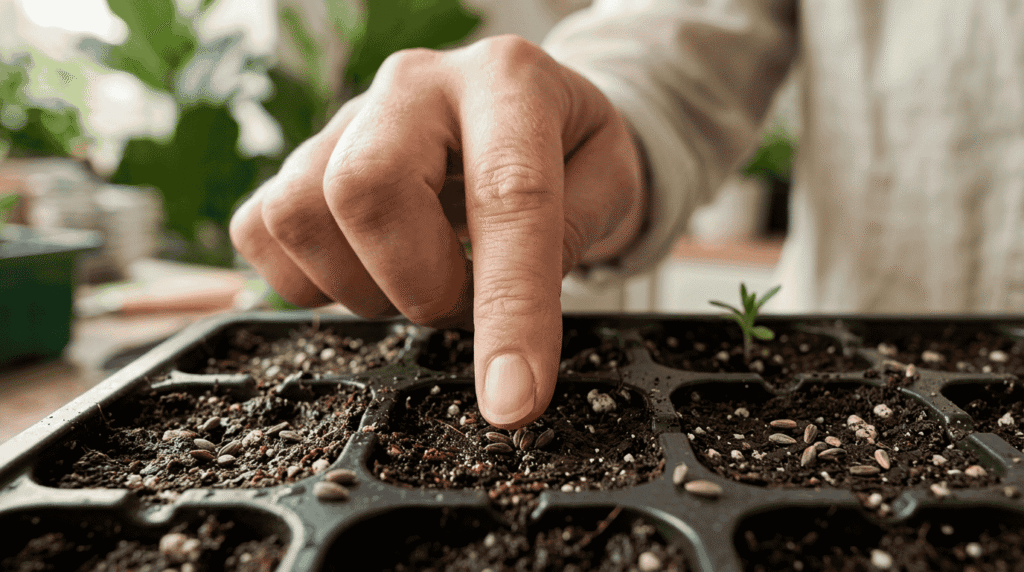
Step 3 — Sow seeds on the surface. Lavender seeds need light to germinate — this is critical. Do NOT bury them. Press seeds lightly onto the surface with your fingertip. Space them 1–2 inches apart if using a tray.
Step 4 — Cover very lightly. Sprinkle the thinnest possible layer of perlite or vermiculite over the seeds — just enough to barely cover them. Alternatively, leave them fully uncovered and simply press them down.
Step 5 — Cover with a humidity dome or plastic wrap. This maintains moisture during germination. Remove the cover daily for 5–10 minutes to allow air circulation and prevent mold.
Step 6 — Place in a warm location. 65–70°F (18–21°C) is ideal. A heat mat set to this temperature dramatically improves germination rates. Do not exceed 75°F.
Step 7 — Provide light. Once seeds are sown, place under a grow light or on a bright south-facing windowsill. 14–16 hours of light per day is ideal.
Step 8 — Water carefully. Use a spray bottle. Never pour water directly onto seeds — it will wash them away or bury them too deep. Keep soil consistently damp but never waterlogged.
Step 9 — Wait. This is the hard part. Check daily but resist the urge to over-interfere.
Light, Temperature & Germination Conditions
| Factor | Ideal Range | Notes |
|---|---|---|
| Temperature | 65–70°F (18–21°C) | Heat mat recommended |
| Light | 14–16 hours/day | Grow light or bright south window |
| Humidity | Moderate | Cover with dome; ventilate daily |
| Soil moisture | Evenly damp | Never soggy, never bone dry |
| Air circulation | Important | Prevents damping-off and mold |
One thing most guides don’t mention: lavender seeds are sensitive to temperature fluctuations. A windowsill that’s warm during the day but drops to 50°F at night will significantly slow or prevent germination. Consistency matters more than peak temperature.
Germination Timeline: Realistic Expectations
Here is what you should genuinely expect — not the optimistic version:
- First signs of life: 14–21 days (fast end) to 45–90 days (slow end)
- Average for well-stratified, fresh seeds: 21–35 days
- Average for unstratified seeds: 30–90 days, if they germinate at all
- Percentage of seeds that germinate: Typically 50–70% for quality fresh seeds; can be as low as 20–30% for older seeds
Do not give up before 90 days. Lavender is not a radish. It operates on its own timeline and has no interest in your impatience.
Myth to bust: “Lavender is easy from seed.” It isn’t — at least not compared to tomatoes, basil, or most vegetables. The germination is slow, unpredictable, and requires specific conditions. What makes it manageable is preparation, not luck.
Seedling Care
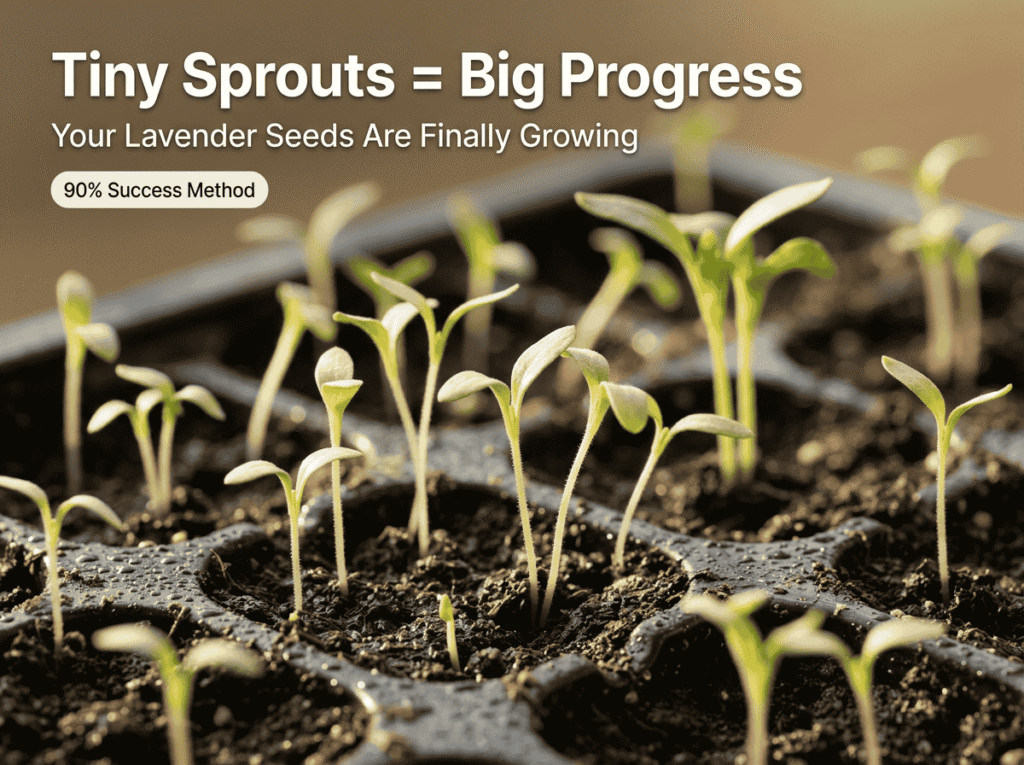
Once you see those first tiny sprouts — congratulations. Now the next challenge begins.
Lavender seedlings are small and delicate. The first leaves you see are cotyledon leaves (seed leaves), not true lavender leaves. Don’t panic — they won’t look like lavender yet.
Watering seedlings: Switch from spray bottle to bottom watering. Place trays in a shallow dish of water for 20–30 minutes, then remove. This encourages roots to grow downward and prevents overwatering the surface.
Light for seedlings: Do not reduce light after germination — increase it if anything. Seedlings that don’t get enough light will become “leggy” — long, weak, pale stems that flop over. A grow light positioned 2–4 inches above seedlings works well.
Thinning: If multiple seeds germinated in one cell, thin to the strongest one. Use scissors to snip the weaker ones at soil level. Don’t pull them out — you’ll disturb the remaining roots.
Fertilizing: Do not fertilize young seedlings. Wait until the plant has at least 4–6 true leaves. Then use a diluted liquid fertilizer (half strength) with low nitrogen content. High nitrogen produces lush, soft growth that is susceptible to disease and poor-quality fragrance.
Temperature: Keep seedlings at 60–65°F. Slightly cooler than germination temperature is fine and actually produces more robust plants.
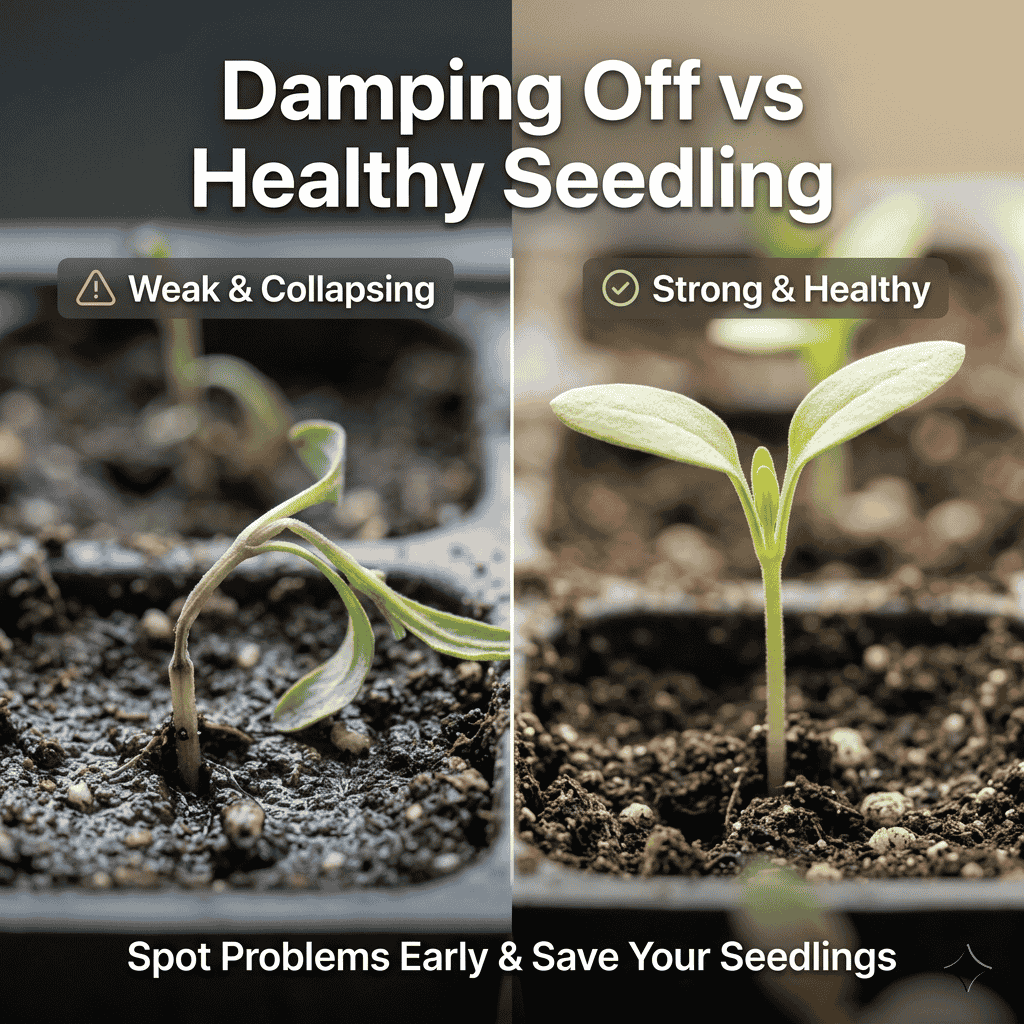
Damping-Off Prevention: The Most Critical Section
Damping-off is the nightmare of lavender seed growers. One day your seedlings look healthy. The next morning, they’ve collapsed at the soil line — stems pinched, shriveled, dead.
It’s caused by a group of soil-borne fungi (Pythium, Fusarium, Rhizoctonia) that thrive in cool, damp, poorly ventilated conditions. It spreads fast and is impossible to reverse once it starts.
How to prevent it:
Use sterile seed-starting mix. Never use garden soil from outdoors. It carries organisms that become deadly in enclosed trays.
Don’t overwater. The single biggest trigger. Allow the soil surface to dry slightly between waterings.
Maximize air circulation. A small fan on low setting near your seedlings (not blowing directly on them) dramatically reduces damping-off risk.
Remove the humidity dome once seeds have germinated. You needed humidity for germination, not for seedling development.
Space seedlings adequately. Crowded seedlings trap moisture and create the microclimate that fungi love.
Avoid cold, wet conditions together. Either cold OR wet is manageable. Cold AND wet is almost always fatal.
If damping-off appears in one area of your tray, remove affected seedlings immediately and improve ventilation and watering habits for the survivors.
Common Problems + Fixes
Seeds haven’t germinated after 30 days — what’s wrong? Most likely causes: insufficient stratification, soil too wet, temperature too low, or old seeds. If conditions are right, continue waiting up to 90 days before concluding failure.
Seedlings are tall and floppy (leggy). Not enough light. Move closer to light source or increase grow light hours. Leggy seedlings can be partially salvaged but rarely become as strong as properly-lit ones.
Leaves are turning yellow. Either overwatering, pH too low (below 6.0), or a combination of both. Check drainage, adjust pH, and reduce watering frequency.
White powdery coating on leaves. Powdery mildew — a fungal issue caused by poor air circulation combined with humidity. Increase ventilation, space plants further apart, and avoid wetting leaves when watering.
Seedlings appear healthy but aren’t growing. Common in early stages — roots are developing first. As long as color is good and soil isn’t waterlogged, patience is the answer. Growth accelerates notably once roots are established.
Soil smells musty or sour. Root rot beginning. Overwatering combined with poor drainage. Remove plant, inspect roots (healthy roots are white; rotted roots are brown and mushy), repot in fresh dry mix if roots are still partially viable.
Grow Lavender in Pots
Container growing is actually excellent for lavender — it gives you complete control over soil, drainage, and positioning.
Pot requirements:
- Minimum 12-inch diameter for mature lavender
- Terracotta pots are ideal (breathable, prevents overwatering)
- Drainage holes are non-negotiable — multiple holes preferred
Soil mix for containers: Use a 60/40 mix of quality loam-based compost and perlite or grit. Commercial cactus/succulent mix works well and is readily available.
Watering in pots: Containers dry out faster than ground soil. In summer, you may need to water twice weekly. In winter, reduce drastically — once every 2–3 weeks may be sufficient. Always check by inserting a finger 2 inches into the soil before watering.
Feeding in pots: Nutrients leach from containers with regular watering. Feed with a low-nitrogen liquid fertilizer monthly during the growing season (spring–summer). Stop feeding in autumn.
Balcony scenario: A south-facing balcony with at least 6 hours of direct sun is genuinely one of the best places to grow container lavender. The reflected heat from walls and flooring mimics Mediterranean conditions well. The one adjustment: you’ll need to water more frequently than ground-planted lavender and protect pots from sitting in water-filled saucers.
Grow Lavender in the Ground
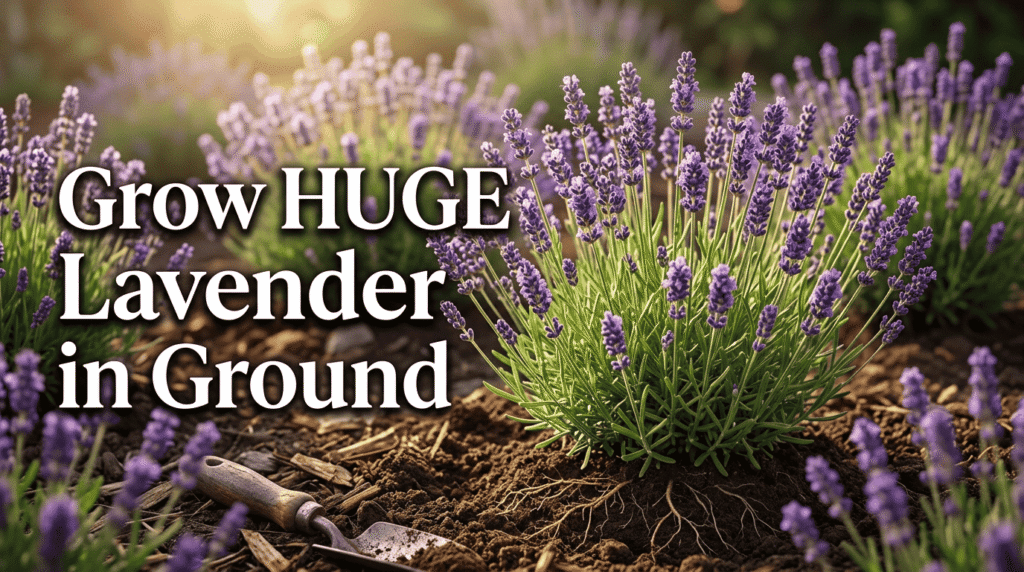
Ground planting suits lavender beautifully once seedlings are established and hardened off.
Site selection:
- Full sun — minimum 6 hours of direct sunlight daily, 8+ hours is better
- Avoid north-facing slopes or areas shaded by buildings/trees
- Good air movement (helps prevent fungal issues)
Soil preparation: If your garden soil is heavy clay, amend before planting. Dig in coarse grit or sand (not builder’s sand) at a ratio of 1 part grit to 2 parts existing soil. This improves drainage without removing the soil structure lavender roots need.
Raised beds work extremely well for lavender in areas with heavy rainfall or clay soil.
Spacing: Plant lavender 18–24 inches apart. They will fill in and merge eventually, but good airflow in the early stages prevents disease.
Indoor Growing Tips
Lavender can be grown indoors year-round but it has specific requirements that most indoor environments don’t naturally provide.
Light is the limiting factor indoors. A window — even south-facing — rarely provides the intensity lavender needs for long-term health. A full-spectrum LED grow light is not optional indoors; it’s essential.
Air circulation matters more indoors. Stagnant indoor air creates humidity pockets that encourage fungal problems. A small fan running nearby makes a meaningful difference.
Indoor lavender will not bloom as heavily as outdoor. Manage expectations — you can keep it healthy and fragrant indoors, but don’t expect the lush flowering you’d see in a sunny garden.
Temperature fluctuations near windows in winter. Cold drafts from windows at night can damage lavender. If your windowsill gets cold (below 50°F) at night in winter, move plants slightly away or insulate with a curtain between the plant and glass.
Humid climate scenario: If you live in a naturally humid climate — coastal areas, tropical zones — indoor lavender is often more practical than outdoor because you can control the environment. Use a dehumidifier nearby or ensure excellent ventilation. Lavender in humid outdoor conditions often develops fungal issues that can be difficult to manage.
Hardening Off and Transplanting
You’ve raised healthy seedlings indoors. Before transplanting outdoors, they need to be gradually introduced to outdoor conditions — a process called hardening off.
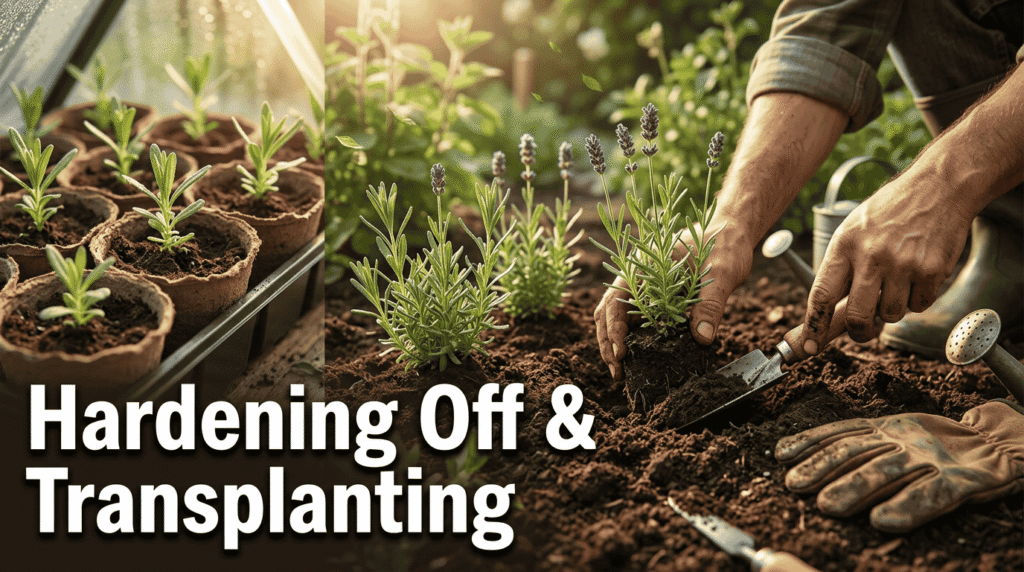
Why it matters: Indoor seedlings aren’t accustomed to direct sunlight intensity, wind, or temperature fluctuations. Moving them straight outdoors stresses or kills them.
How to harden off:
- Week 1: Place seedlings outdoors in a sheltered, partially shaded spot for 1–2 hours per day.
- Week 2: Increase to 4–6 hours, introducing some direct morning sun.
- Week 3: Move to full sun location for most of the day. Bring indoors if frost is forecast.
- Week 4: Plants are ready to transplant permanently.
Transplanting:
- Transplant on a cloudy day or in the early evening to reduce transplant shock.
- Water the seedling in its pot thoroughly before removing.
- Dig a hole slightly larger than the root ball.
- Set the plant at the same depth it was in the pot — do not bury the stem.
- Firm soil gently around roots and water in.
- Do not fertilize immediately after transplanting — wait 2–3 weeks.
Ongoing Care
Once established, lavender is remarkably low-maintenance. The biggest mistakes at this stage are well-intentioned overcare.
Watering established plants: Water deeply and infrequently. Once every 1–2 weeks in the growing season is usually sufficient for in-ground lavender. Let soil dry out significantly between waterings.
Pruning: Prune after flowering — typically late summer. Remove spent flower stems and trim back about one-third of the plant’s foliage to maintain a compact shape. Do NOT cut back into old wood (the woody base) — lavender rarely recovers from this.
Mulching: Use gravel or grit rather than organic mulch. Organic mulches retain moisture around the crown and can cause rot. Gravel also reflects heat and keeps the crown dry.
Feeding: An annual application of a slow-release low-nitrogen fertilizer in early spring is sufficient for established plants. Overfed lavender grows lush, floppy, and less fragrant.
Winter care: Lavandula angustifolia is cold-hardy down to approximately USDA Zone 5 (around -20°F/-29°C). Provide a light gravel mulch around the crown in colder zones. Container lavender should be moved to a sheltered location or unheated garage in harsh winters.
Harvesting Lavender
Your lavender will likely not bloom in its first year. This is normal and expected. Focus on root development in year one.
In year two, you’ll see your first real flush of blooms.
When to harvest: Harvest when approximately half the florets on each spike have opened. At this stage, fragrance is at its peak and the essential oil content is highest. Harvesting too late results in seeds being released and reduced fragrance.
How to harvest: Use sharp, clean scissors or pruning shears. Cut stems long — down to just above the lowest set of leaves. Cutting long stems also serves as your summer pruning.
What to do with harvested lavender:
- Dry bundles: Tie in small bunches and hang upside down in a warm, dark, well-ventilated area. Drying takes 2–4 weeks.
- Fresh use: Lavender flowers are edible and can be used in baking (cookies, shortbread, lemonade). Use culinary varieties only — Lavandula angustifolia is best.
- Sachets and potpourri: Dried lavender buds in small fabric bags are a classic use for wardrobes and drawers.
- Infused oil: Cover dried buds with a carrier oil (like jojoba or sweet almond) and let steep for 2–4 weeks in a cool, dark location.
Final Summary: What to Actually Expect
Growing lavender from seed is a journey, not a quick project. Here is a realistic timeline:
| Stage | Timeframe |
|---|---|
| Cold stratification | 3–4 weeks |
| Germination | 2–10 weeks |
| Seedling development | 6–10 weeks |
| Hardening off | 3–4 weeks |
| Transplant and establishment | 2–3 months |
| First bloom | Year 2, typically |
| Full mature plant | Year 3–4 |
Is it slow? Yes. Is it worth it? Completely.
There is a particular satisfaction in growing lavender from seed that no other propagation method replicates. Every bloom in your garden carries the full history of your patience, preparation, and genuine care.
Follow the steps in this guide — particularly the stratification, the drainage, and the light — and you’ll avoid the most common failures. The rest is simply time.
Quick reference checklist for first-time lavender seed growers:
- ✅ Source fresh seeds (less than 1 year old)
- ✅ Stratify for 3–4 weeks in the refrigerator
- ✅ Use 60/40 seed mix and perlite blend
- ✅ Sow seeds on the surface — never bury deep
- ✅ Maintain 65–70°F during germination
- ✅ Provide 14–16 hours of light daily
- ✅ Water from the bottom once seedlings appear
- ✅ Keep air circulating to prevent damping-off
- ✅ Harden off before transplanting outdoors
- ✅ Be patient — lavender rewards patience above everything else